

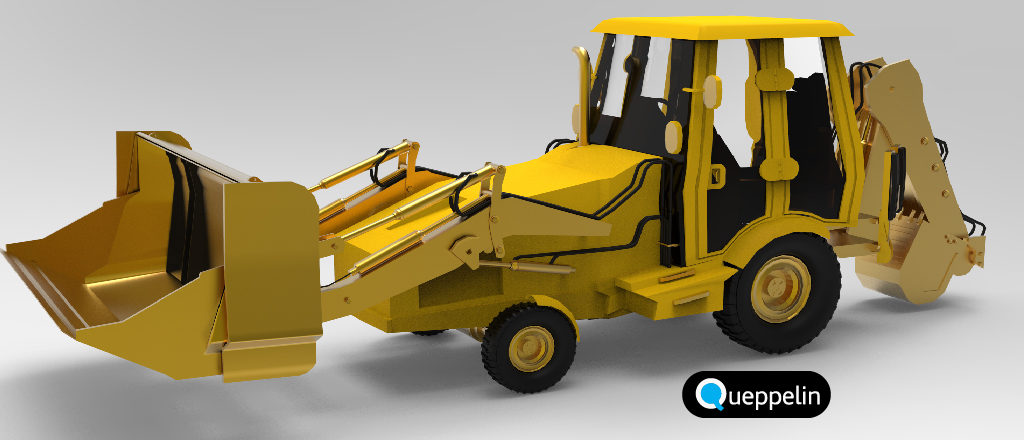
3D models and animations have played a great role in augmented reality app development. If you are thinking of an AR/VR project you will need to create 3D models.
Now, the question arises of how one can turn any physical object into a photo-realistic 3D model that will look like a real object. Let’s see how it could be done in any Augmented Reality application.


What are the available options to create a 3D model from real objects?


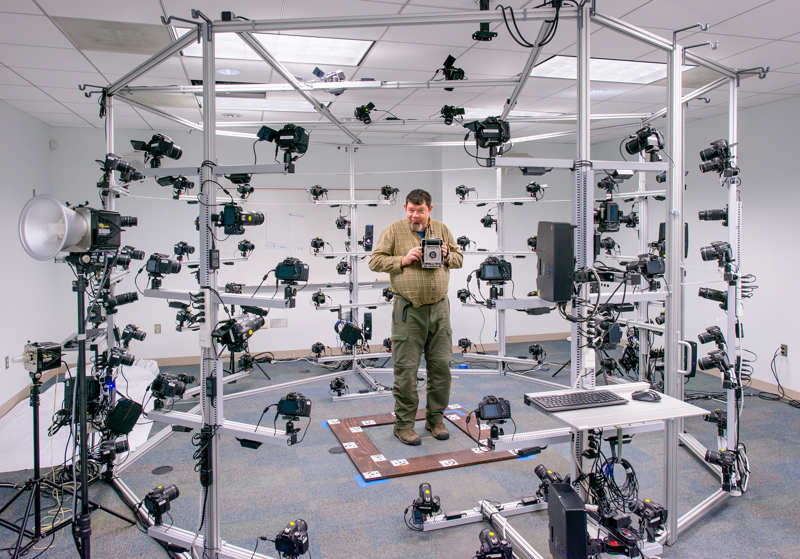
Photogrammetry
Photogrammetry process is used to create a high-density mesh of an object. This can be done with the series of photos taken of that object. The mesh defines the shape of the object. The software also creates texture images to define the color of the object. It is also helpful in defining how the light will interact with the object, how much an object is rough or smooth, etc.

Photogrammetry renders instantaneous data capture. It means even if the object moves slightly, it will not affect the final 3D data capture.
Consequently, it doesn’t hurt the 3D printed figure. But there are several cons associated with it:
- Studio setup is quite difficult
- It’s not easily portable
- It isn’t able to provide the details of the object as 3D scanning solutions.
3D Scanning

The 3D scanning process is quite similar to photogrammetry and is differentiated with the use of specialized hardware. Well, it also shares most of the issues that photogrammetry has. Though it is highly accurate, it provides a texture set and a non-optimized model. This results in a larger file size and would require more man-hours to make it potentially ready for use. Moreover, the overall cost will increase in getting a good 3D scanner or getting the object scanned elsewhere.
Pros:
- Applicable for any color and texture
- Light setup and body movement would not affect it
- Provides higher resolution and accuracy than photogrammetry
Cons:
- Laser scanning is good for a mid-sized object but not suitable for very small or large objects
- Sometimes accuracy is not up to the mark so several scanning will be required
- 3D scanners are much expensive
3D Modelling Programs


This lets an artist create a 3D model from scratch. However, it provides an optimized and accurate 3D model of an object, but it is time-consuming. Also, it requires an expert modeler to get things right. One of the tools used for 3D modeling is Maya. Moreover, texture painting can be done with Substance Painter or Mudbox.
What is the step-by-step process of 3D modeling?
Take reference photos and measurements
- A lens having a long focal length should be used. A lens with a short focal length makes a photo skewed and is not suitable for 3D modeling in AR.
- To create an accurate model, a photo should be taken from varied angles i.e. front, back, top, bottom, left, and right.
The photo is then imported into tools like Maya. One must remember that the goal is accuracy. It is necessary that the 3D model will reflect the real-world proportion of the products otherwise AR app will be misleading and have no worth.
Thereafter, it would be required to measure length, height, and the width of the object
Modeling of the reference objects

After the measurements are taken and the scene file has been set, the next step is to get the primitive shapes like cube, cylinder, or sphere. Then details are added till we have an exact representation of the product. We must also keep in mind to keep the mesh complexity as low as possible for the app to load the data faster.
Once the modeling part is complete, we are required to export two files. One has high-density mesh and the other has low-density mesh. These two are important because most of the game engines work on low density and will not render high-density models in real-time. These files are then imported to Substance Painter where textures are added.
Surface details from the high-density models could be imposed over a low-density model in order to keep the model low density while retaining the texture details of the high-density model.
Painting the texture of the objects


To give an accurate texture to the object, you need a high-density mesh. With substance Painter, a 3D painting software can generate various effects such as scratches, rust, etc. with 360-degree photos, the software will be helpful in giving the actual look i.e. you could make it look to match with the environmental lighting.


Preparing the models for AR
The 3D model needs to be exported in the correct format that should match with the requirement of your 3D engine. For instance, if you are creating a native Swift app with Xcode, you will need Collada (DAE) format and the texture should be exported in JPEGs.
To give the original look to the object, you will need an extra texture for shadow. Without shadow, texture object will look like it is floating above a surface. So it should be created prior and saved as a texture to be used underneath the mesh of the product.
There are tools and process flow that are available for creating a high-quality 3D model of an object. Still, it is manual and time-consuming. If you are looking for a partner for augmented reality app development with 3D and animation, drop a mail at enquiry@queppelintech.com for your requirement.